Product Option Customizer & Product Bundler: Creating and Applying Materials for Custom Products
When designing custom products, you might find yourself repeatedly creating the same option categories and uploading the same images to different products. For example, if you have a collection of cat images that you want to use across various products, you may need to categorize them by breed, color, and more, then upload each image one by one for every product. This can be time-consuming and inefficient.
To streamline this process, the Preview Design customizer in the Product Option Customizer & Product Bundler app offers a Material Library feature. This feature allows you to upload your design materials to a centralized library once and reuse them across multiple products, saving you valuable time.
Creating and Applying Image Materials
This section explains how to create image materials in the Material Library and apply them to custom product designs.
Creating Image Materials in Your Library
-
In your SHOPLINE admin panel, go to Apps > Product Option Customizer & Product Bundler.
-
Click the Customized product tab, select Material Library, then click Create Material.
-
Enter a preferred name for the material and click Create.
-
Click Add Image to upload images. You can add multiple images at once.
-
On the image list, you have the following options:
-
- Sort: Drag and drop the images to adjust their sequence. This sequence will match the image option order on the product details page.
- Image Name: Hover over the image to change its name by clicking on the pencil icon.
- Color Card: Click on the palette icon to select a color for the image. If selected, the color card will be displayed as the option on the product page.
- ID: The ID represents the upload order of each image and is unique, so it cannot be changed manually.
- Delete: Click on the trash bin icon to delete any image that is no longer needed.
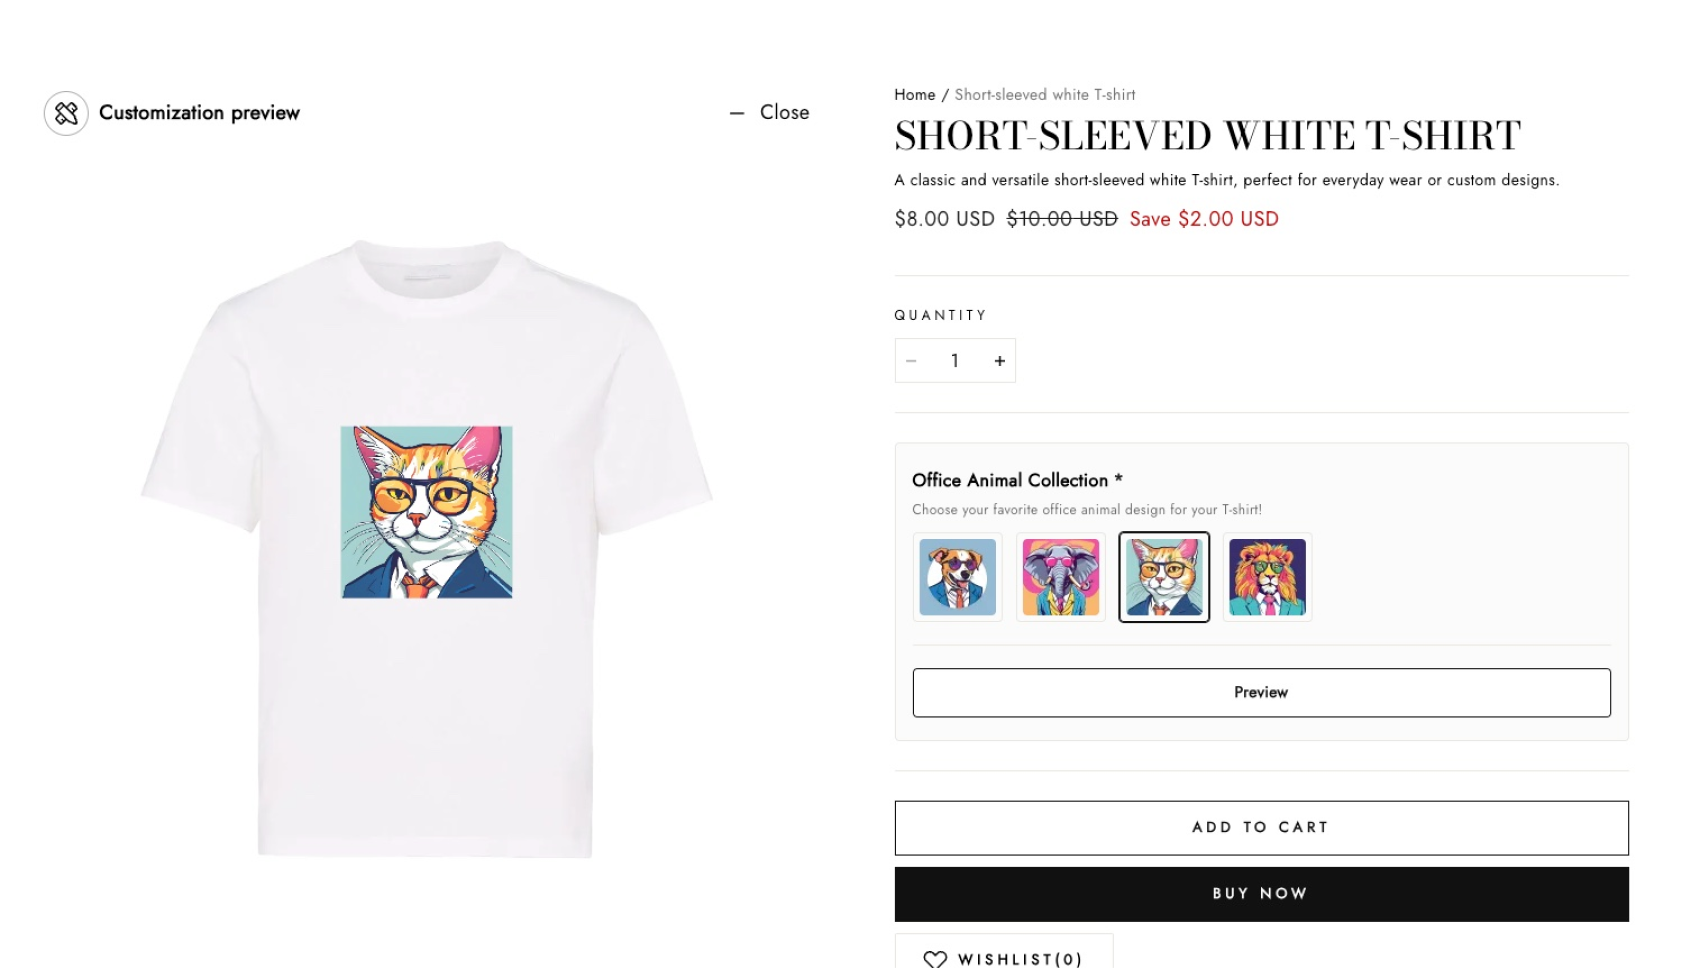
Applying Image Materials for Custom Products
-
In the app, click the Customized product tab, select Customized product, then click Add preview designs.
-
Select the product you want to apply a material to and click Add.
-
Choose a customization template if needed, then click Confirm to enter the customizer.
-
In the customizer, click Image options and configure the following settings in the right panel:
- Title: Provide a clear title for the image options.
- Notes: Include instructions for customers regarding image selection.
-
Product requires custom element: Enable this option if you want to make the service required.
-
Under Options, choose Select from Material Library. Then, select the image material you want to apply and click Select.
-
Use the up and down arrows in the Sort box to preview the images. The display sequence matches your Sort settings in the library.
-
Go to the Preview Settings tab to upload the background image.
-
Click Save. Then, visit your store to preview the settings.
-
If satisfied, toggle on the Enable switch to activate the service.
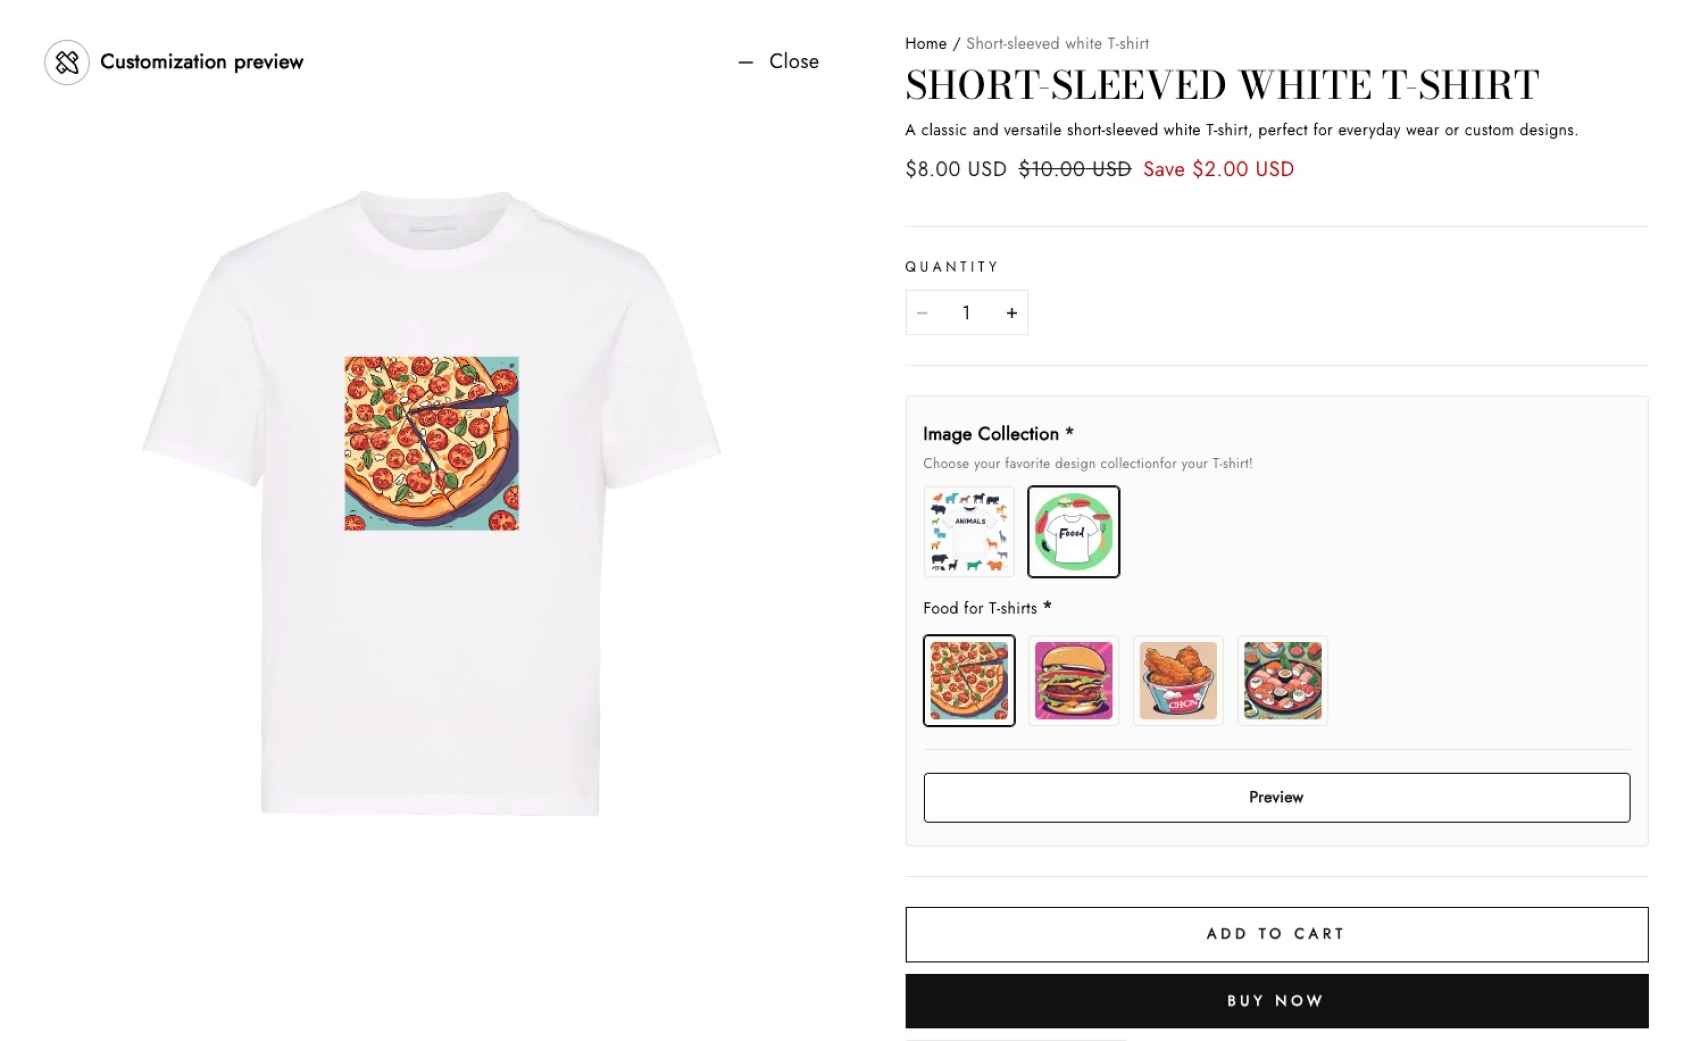
Custom Effect on the Product Page
Creating and Applying Category Materials
This section outlines the steps for creating category materials in the Material Library and applying them to custom product designs.
Creating Category Materials in Your Library
-
In your SHOPLINE admin panel, go to Apps > Product Option Customizer & Product Bundler.
-
Click the Customized product tab, select Material Library, then click Create Material.
-
Enter a preferred name for the material and click Create.
-
Click Add Category.
-
Provide a Category Name, upload a Category Image, and select a Color Card if needed. Then, click Create.
-
Click Add Image to upload images to this category. You can add multiple images at once.
-
On the category list, you have the following options:
-
- Sort: Drag and drop the categories to adjust their sequence. This sequence will match the category option order on the product details page.
- Category Name: Hover over the category to change its name by clicking on the pencil icon.
- Color Card: Click on the palette icon to select a color for the category. If selected, the color card will be displayed as the option on the product page.
- ID: The ID represents the creation order of each category and is unique, so it cannot be changed manually.
- Delete: Click on the trash bin icon to delete any category that is no longer needed.
- Create additional categories as needed by repeating the steps above.
Applying Category Materials for Custom Products
-
In the app, click the Customized product tab, select Customized product, then click Add preview designs.
-
Select the product you want to apply a material to and click Add.
-
Choose a customization template if needed, then click Confirm to enter the customizer.
-
In the customizer, click Image options and configure the following settings in the right panel:
-
- Title: Provide a clear title for the image options.
- Notes: Include instructions for customers regarding image selection.
-
Product requires custom element: Enable this option if you want to make the service required.
-
-
Under Options, choose Select from Material Library. Then, select the category material you want to apply and click Select.
-
Use the up and down arrows in the Sort box to preview the images. The display sequence matches your Sort settings in the library.
-
Go to the Preview Settings tab to upload the background image.
-
Click Save. Then, visit your store to preview the settings.
-
If satisfied, toggle on the Enable switch to activate the service.
Custom Effect on the Product Page